Thursday, January 31, 2013

Cake Batter Pancakes

I had the morning off of work, so I decided to make something from scratch rather than the grab and go breakfast I usually have in the morning.  This recipe was pinned onto the Recipes Jenn Should Try board by Kelsey G.  I also pinned it awhile back, but from a different source; turns out the recipes are exactly the same! They both actually got it from How Sweet It Is


The ingredients the recipe calls for:


1 1/2 cups all purpose flour
 2/3 cup yellow cake mix (I used funfetti cake mix)
1 tablespoon sugar
3/4 teaspoon baking powder
1/8 tsp salt
2 eggs
1 teaspoon vanilla extract
1-2 cups milk (varies depending on cake mix) (I used 1 cup)
assorted sprinkles

I read the comments on the blogs, and people have said that they used other types of cake mix and got good results.  I used funfetti cake mix since I didn't have any yellow cake mix on-hand and had opened a box of funfetti for the cake batter cookies I recently made. (Btw, the difference between white and yellow cake is that yellow cake calls for whole eggs and white cake calls for just the egg whites; the flavors are the same). 

The directions:

Combine flour, cake mix, baking powder, sugar and salt in a bowl and mix. Add 1 cup of milk, egg and vanilla extract and stir until smooth.  You want the batter to look like regular pancake batter; not too thin, not too thick. This will vary greatly on the brand of cake mix you use. Start with 1 cup of milk and add more if needed.

Mine looked good after just one cup of milk:


Preheat a skillet on medium heat (I use an electric grilled and turn it to 275 degrees). Fold desired amount of sprinkles into batter. Pour batter in 1/4 cup measurements onto skillet and let cook until bubbles form on top, about 2-3 minutes. Flip and cook for 1 minute more.


To be completely honest, I'm too lazy to actually measure out the amount of batter per pancake.  I just estimated 1/4 cup of batter each time, and I did pretty well.  I got about 11 pancakes (10 big ones and 2 half-sized ones for my dogs-they LOVE pancakes)
  
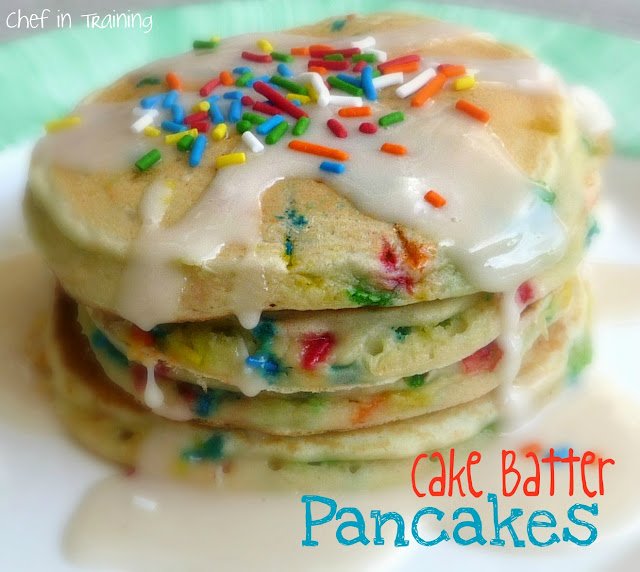
Serve with vanilla glaze.

 And for the glaze:

1 cup powdered sugar
1/2 tablespoon milk (I used a tablespoon plus a teaspoon)
1/2 teaspoon vanilla extract (I used a full teaspoon)
assorted sprinkles


Mix milk, extract and powdered sugar until glaze forms. You may need to add a little more sugar or water/milk to reach desired consistency. Mix into glaze and drizzle on pancakes. Top with extra sprinkles.


And the verdict?  Looks better than it tastes.  The pancakes were okay.  I didn't think that they tasted that much like cake batter; they tasted like normal pancakes, just a little sweeterI'm guessing that's because it needs more cake mix and less flour.  The cake batter cookies were half cake mix, half flour and tasted like cake, whereas these were 2/3 cup cake mix, 1 1/2 cup flour and pretty much tasted like regular pancakes.  

I didn't like the glaze because it just tasted like powdered sugar.  I added more vanilla extract to give it a more vanilla-y taste and it didn't make that much of a difference.  I think a cheese cream glaze would have been better, or even just adding some butter flavoring to it so it would be more frosting like.  Even a fruit-flavored syrup would have been better than this glaze.

Overall, I was pretty disappointed with this recipe.   I really was hoping they would be as good as the cake batter cookies, but in the end I was bummed out.  I tried so hard to like it and although the pancakes weren't bad, they were also not worth the effort of making them this way.  It would probably be better to make normal pancakes and add sprinkles (and maybe some vanilla extract and sugar) to the batter.  I did not like the glaze at all and wouldn't make it again.

Bottom Line: NOT WORTH IT!  

Tuesday, January 29, 2013

Cookie Dough Greek Yogurt

I'm a big fan of Greek yogurt and I love chocolate chip cookie dough, so this recipe sounded awesome to me.  I decided to make it this afternoon as a snack to bring to work with me.


The ingredients:

1 small container of plain Greek yogurt (6 oz)
1 tbsp nut butter (I used peanut butter) same
1 tbsp sweetener (like maple syrup or honey) I used honey
1/4 tsp vanilla
pinch of sea salt
1 tbsp mini chocolate chips (I used Enjoy Life) I used Nestle

After reading the ingredients, I had a feeling that this recipe wasn't going to really taste like cookie dough.  I decided to try it anyways.  

Here are the directions: 

Combine the Greek Yogurt with the nut butter, sweetener, vanilla and sea salt. Mix until smooth.
Top with Mini Chocolate chips. Enjoy!

Here's my final product:


I got hungry at work and took a bite.  Does it taste like cookie dough? No, it actually tastes more like a Reese's peanut butter cup than anything else.  Doesn't remind me of cookie dough, not even peanut butter cookie dough, at all.   I only ate about half of it, then I threw the rest away.  It didn't taste awful, but it wasn't exactly good either.  I much prefer Greek yogurt with just the honey, and maybe some fruit.  

I love the idea of this and it got me thinking...how would cake batter Greek yogurt taste?  Maybe adding a couple tablespoons of funfetti cake mix and some vanilla would be awesome.  I'm going to try it and I'll update you all on how that one comes out! 

The Bottom Line: NOT WORTH IT


Sunday, January 27, 2013

Cake Batter Chocolate Chip Cookies

This recipe was pinned to Recipes Jenn Should Try by Jennifer H. Thank you for your suggestion!  


The ingredient list:
  • 1 and 1/4 cup all-purpose flour
  • 1 and 1/4 cup yellow or white boxed cake mix (I used funfetti cake mix)
  • 1/2 teaspoon baking soda
  • 3/4 cup (1.5 sticks) unsalted butter, softened to room temperature
  • 1/2 cup granulated sugar
  • 1/2 cup light brown sugar
  • 1 egg, at room temperature
  • 1.5 teaspoons vanilla
  • 1 cup chocolate chips (I used a blend of white and semi-sweet chocolate chips) (me too!)
  • 1/2 cup sprinkles
The instructions were pretty much like any other chocolate chip cookie:
 
In a large bowl, sift together flour, cake mix, and baking soda.  Set aside.  In a separate bowl, cream together the butter and sugars on medium speed.  Mix in the egg and vanilla until creamy.
Add the flour mixture to the wet ingredients and mix until just combined.  Do not OVERMIX the dough. Fold in the chocolate chips and sprinkles.

Here's my dough:
 

Cover and refrigerate dough for at least 1 hour, or up to 4 days.  This step is mandatory. The dough is fairly sticky, so chilling the dough is required in order to avoid the cookie from spreading too much.

I refrigerated my dough for a day before baking it.

Preheat oven to 350 degrees. Scoop rounded tablespoons of the cold dough onto an ungreased baking sheet.  Shape your cookie dough balls to be “taller” than they are wide.  Make sure to keep dough chilled when working in batches.


I LOVE this idea!  Literally changed the way I bake cookies!

Bake for 10-12 minutes until edges are slightly browned.  (Mine took 10 minutes exactly). The centers will still appear very soft, but the cookies will set as they cool.  Allow the cookies to cool on the baking sheet for 4 minutes and transfer to a wire rack to cool completely.

Mine took 11 minutes to cook.


And...

They were amazing! The cookies were soft, chewy and delicious!  They taste like cake batter and are better than any chocolate chip cookie or cake I've ever had.  Seriously!  I'm definitely not using the Nestle chocolate chip cookie recipe anymore.

 
P.S. The blog this recipe came from, Sally's Baking Addiction , is awesome!  I definitely recommend checking it out if you like baking.  She has some really great recipes and baking tips :) 

Bottom Line: LOVED IT!


Tuesday, January 22, 2013

Slow Cooker Coca-Cola Barbecue Chicken

I've been obsessing over pinning crock pot chicken recipes so I figured I would try one of them. This one claimed to be SO EASY to throw together and tastes like something you have spent all day slaving over!


The recipe called for:

4-6 boneless, skinless chicken breasts (frozen)
1 lemon, quartered
1 onion, quartered
1 20 ounce bottle of BBQ sauce (any brand or flavor you prefer)
1 can of Coca Cola

This is the kind of BBQ sauce I used:


The directions:

 Peel onion and cut into quarters.  Cut lemon into quarters.  Place chicken breasts in crock pot.  Place onion and lemon quarters on top.  Pour in entire bottle of BBQ Sauce and entire can of Coke.  Cover and cook on low for 6-8 hours or high for 3-4 hours.

This is what my crockpot looked like after piling in all the ingredients.  I ended up moving it to a bigger crock pot because it was so full.  


I cooked mine for 4 1/2 hours, but my chicken was also frozen pretty solid.

This is what it looked like when it was done:


The sauce was really watery; I'm guessing it's the combination of the chicken being frozen and releasing excess water while thawing, and the cola .

And the chicken breast alone:


The verdict? It was good; tastes a little sweeter than normal BBQ with a hint of lemon.  My dad who is one of the pickiest people you will ever meet even ate it! (To be fair, I didn't tell him what's in it because he doesn't like trying new flavor combinations.  Picky, right?)  I wouldn't say that it tasted like something you spent all day slaving over, but it was easy and tasty.  

I had a lot of leftovers so I put them in tupperware and spooned some of the sauce and onions on top of the chicken.  Guess what? The chicken actually tasted better the next day!  I used it to make a BBQ chicken salad, and it was awesome.  

Next time I make it, I'm thinking that I'll thaw the chicken, at least partially first, and add some cornstarch so that the resulting sauce is thicker.  

Bottom Line: LOVED IT! 


Friday, January 18, 2013

Vodka Infused Gummy Bears *WARNING: These are addicting!*

I tried this last summer for my sister's grad party and fell in love with them! I just made them again this past week for the NFC championship game on Sunday. Go Niners! I thought I'd share this with some helpful tips so that you can make them at home. (Our family friend tried to copy my gummies after trying them at the party and didn't fare so well...)


Here's the original blog post.  The directions are as follows:

Simply put the gummies in a baking dish or Tupperware, cover them in vodka and leave them in the fridge for about a week.

I also read another blog post via a pin I found on Pinterest.  I wish I would have saved it because the directions on there were different.  It used plain vodka and fruit juice rather than flavored vodka. 

I opted to use 2 different flavored alcohols: Skyy Pineapple and  Bacardi Watermelon, and Brach gummy bears. 

The recipe says it takes a week but  on the other blog post (should have save it!), people said they only do it for a couple of days and I turns out fine. I decided to make 2 batches-one a week in advance and one 4 days in advance. Let me tell you, there's a BIG difference!

As for my tips:

1. Plan ahead!  Start making these a week in advance or the middles of your bears won't be soft and they don't taste as good.
2.  Use a shallow dish/tupperware.  If you don't, the gummies will become very gooey and stick together in big globs (this is what our family friend did).
 3. Stir the gummies!  I stir it about 3 hours after mixing the gummies and the alcohol AND then once a day until they are ready.
4. Add more alcohol if the gummies suck it all up and are not gooey in the center. 
5. Use Hairbo gummy bears if you actually want to taste the gummy bears.  The Brach bears only taste like the alcohol since you don't taste distinct flavors that much in the first place. 

My final products for the graduation party: 
(Obviously I was drinking before I made the signs because it should be "Under 21")


 The pineapple ones came out better because they were in the fridge for a week, and overall, I liked the pineapple flavor better than the watermelon.  I am definitely going to try out other flavors in the future. 

And the ones I made last week using pineapple Skyy and Hairbo gummy bears:


*NOTE:  You can also use other types of gummies besides bears: drunken gummies pinterest search  I haven't done this yet, but I definitely intend too!  I wonder if cinnamon bears will work for this...

Bottom Line: LOVED IT! 

Suggestions??

I'm taking suggestions from you guys! If you have any recipes you'd like me to try post the link for the pin as a comment on this post, and I'll do my best to test it out and let you all know the outcome. (I'm allergic to oranges, so sadly I will not be able to test any recipes with oranges in it).

I also started a board on my Pinterest called "Recipes Jenn Should Try." Feel free to pin recipes on there or request to join the group board if you're not part of the board yet.

Tuesday, January 15, 2013

Bacon and Broccoli Stuffed Double Baked Potatoes

I found a blog called Lose Weight By Eating, and have been following the author, Audrey, on Pinterest ever since.  She pinned this recipe on Pinterest about a month ago, and I had been dying to try it!   I finally made it last week as a side dish for lunch (I served it with some grilled chicken).


This is what the pin description said:
Bacon and Broccoli Stuffed Double Baked Potatoes- 288 calories.

When you click on the link on the pin, it gives you a suspicious link message :(   I'm not sure why since it worked last week when I printed out the recipe.  Good news, I have the link to the original blog post! :) 

The ingredients for 2 servings:
 
1 large Potato
1 tsp Garlic Oil
1 slice of Thick Cut Bacon chopped (used 2 slices of pre-cooked bacon)
1/2 cup Broccoli heads chopped
1/3 cup Greek Yogurt (used 0% Fage)
1/4 cup Shredded Cheddar Cheese (used a blend of cheddar and jack)
Salt and Pepper to taste
Hot Sauce- optional (I opted not to use any)

The directions: 

Heat oven to 425. Stab the potato a few times with a fork and heat in the microwave for 3-5 minutes until cooked through.

I cooked mine for 5 minutes.
 
In a medium skillet heat the oil on medium high then add the bacon and broccoli and cook until crispy and delicious.

I did all of this in the microwave.  The pre-cooked bacon took 20 seconds and steaming the broccoli took 30 seconds.  Faster and you don't have to add any fat!

Once the potato has cooled enough slice in half, length wise. Using a spoon hollow out the flesh/insides of your potato halves, move 1/2 of the potato’s flesh (you only want 1/2 of the insides, discard the rest) to a small bowl and smash with the back of your spoon or a fork.


Then add the Greek yogurt, the cheese (hold some back for the tops) and the broccoli  bacon mixture, add salt and pepper and a little hot sauce if you like and mix together.

Then fill the hollow halves of the potatoes with the mixture and add the rest of the cheese.


Place in the oven for 10 minutes, remove from oven and plate.

I baked mine for 12 minutes since they didn't look crispy enough.  I would have baked them longer but the tops looked browned even though the bottoms didn't seem crispy.

 
The verdict: tasty but not crispy enough.  I think that these would come out better if the hollowed out potatoes were baked without the filling so they actually become crispy.  I'll remember that for next time...

Bottom Line: LOVED IT!


Monday, January 14, 2013

Old Spaghetti Factory Copy Cat Pesto Dressing

After going to the Spaghetti Factory with a friend, I fell in love again with their pesto dressing. I was inspired to make my own at home: I mixed together store bought pesto and ranch dressing expecting similar results...epic fail! Nowhere near as good! Barely edible actually; I don't recommend it! I was excited when I remembered that I pinned a recipe a few weeks back claiming it was a copy cat of the Old Spaghetti Factory's dressing. 


This is what the pin said:

Make it at home in under 5 minutes - The Old Spaghetti Factory's Creamy Pesto Salad Dressing. Tastes just like the Dressing at OSF, but with a thicker consistency.

The recipe called for:
  • 1 cup mayonnaise (I used a lower calorie canola oil blend)
  • 1 1/4 cups low-fat buttermilk (I had the full-fat variety)
  • 1 1/2 Tbsp dried basil
  • 1/2 tsp garlic powder
  • 1/8 tsp salt
  • 1/8 tsp fresh ground black pepper
  • 1/4 cup freshly, finely grated Parmesan cheese
Luckily, I had all the ingredients at home:


 The instructions were easy:

Combine all ingredients in a medium mixing bowl. Whisk until smooth and creamy. Pour into an airtight container and refrigerate 1 hour (this will help the flavors develop, I don't always do it if I don't have an hour to wait). Serve over salad or use as a dip.

Here's what it looked like: 


I tasted it before I put it in the refrigerator, and it was promising!  I put the mixture into a mason jar and refrigerated it overnight.  


I used the dressing for a simple garden salad for lunch the next day and...it was awesome!  Tastes just like OSF but with a thicker consistency; exactly what the pin claimed.  I was really pleased because it did take less than 5 minutes, and it tastes better than anything you would buy in a store!  I will definitely be making this often! 

Bottom line: LOVED IT! 

Sunday, January 6, 2013

Crockpot Apple Cinnnamon Oatmeal

The thing that most enticed me about this post was that I would be able to sleep while my breakfast was cooking!  Almost sounds too good to be true...


Throw 2 sliced apples, 1/3 cup brown sugar, 1 tsp cinnamon in the bottom of the crock pot. Pour 2 cups of oatmeal and 4 cups of water on top. Do NOT stir. Cook overnight for 8 - 9 hours on low.

Sounds easy enough.  

The website the pin orginally came from led to a page with the picture above and a title saying:
 slow cooker apple cinnamon oatmeal...cook overnight to wake up to delicious smells and a tasty breakfast!


I used Red Delicious apples because that's what I had at home.  I did exactly as the directions said on the pin, turned my crockpot on low, and went to bed.  

I woke up and went downstairs immediately to check my creation.  It sure did smell good and it was definitely cooked after 8 hours! 

Here's what my oatmeal looked like (sorry it's a little blurry):


And the verdict?  Needs more sugar!  It didn't taste bad, but it wasn't all that good either.  I added about a tablespoon of white sugar to my bowl of oatmeal.  The oatmeal itself was kind of mushy.  Maybe it cooked too long?  

I found a similar recipe that is done over the stove top.  There's NO sugar in that recipe so I'm guessing it'll come out about the same.  Bummer, I really liked the idea of this recipe!

 The Bottom Line: NOT WORTH IT